


One concern when creating an existing site using Shopify and moving to Shopify is that the URLs of pages that are very important from an SEO perspective and are displayed at the top of search results may change.
To eliminate such worries, Shopify has a redirect function, so I would like to explain how to set it up.
This article is for those who are considering moving to Shopify.
table of contents
I'm sorry to start off with a digression, but I'll be honest , this page was originally made with WordPress and then moved to Shopify . It's not a huge number of pages, but the page with the most hits was the blog, so I wanted to protect that number at all costs.
So I would like to write down the process of setting up the redirect.
(Prerequisite knowledge) Shopify URL structure
One thing you should know as background is that while Shopify allows you to use your own domain, the directory structure cannot be modified in any way .
What this means is that "collection pages" (categories) will be placed under a directory called "collections", and product pages will be placed under a directory called "products".
- **.com/ collections /name/
- **.com/ products /name/
You cannot change the parts of the URL that are in red like this!
In other words, there are almost no cases where you can inherit the URL of your previous site exactly, so you should assume that the URLs of your product pages and blogs will definitely change. If you try to move to Shopify without knowing this, you will be left wondering "Huh? How do I set up a directory?" during the transfer.
Don't worry, you can't create directories!
If you notice something is wrong, it's time to use redirection .
Redirects have settings
Thankfully, Shopify has a solid and thorough solution for this, and includes a default function for setting up redirects.
Why is it here?
The redirect setting is in the location.
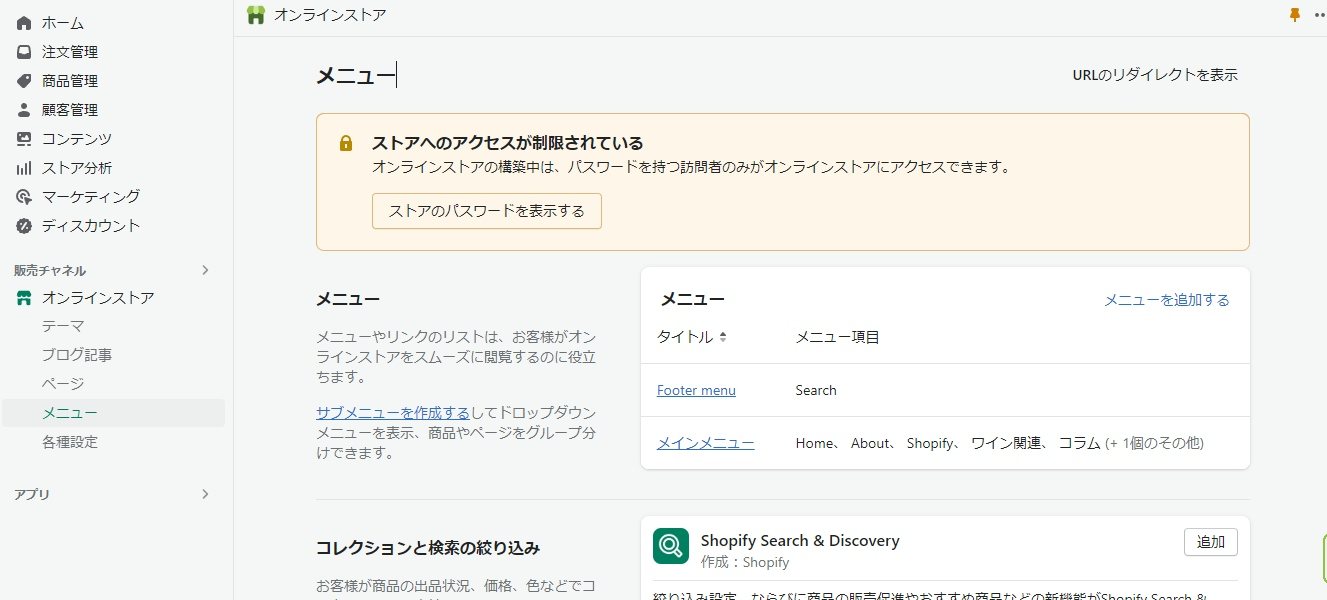
It's inconspicuously located in the top right corner of the menu settings as an option called "Show URL redirects."
It's a bit of a mystery why the redirect settings are in the "menu". But, if you leave that mystery aside and click on it, the following screen will initially appear.
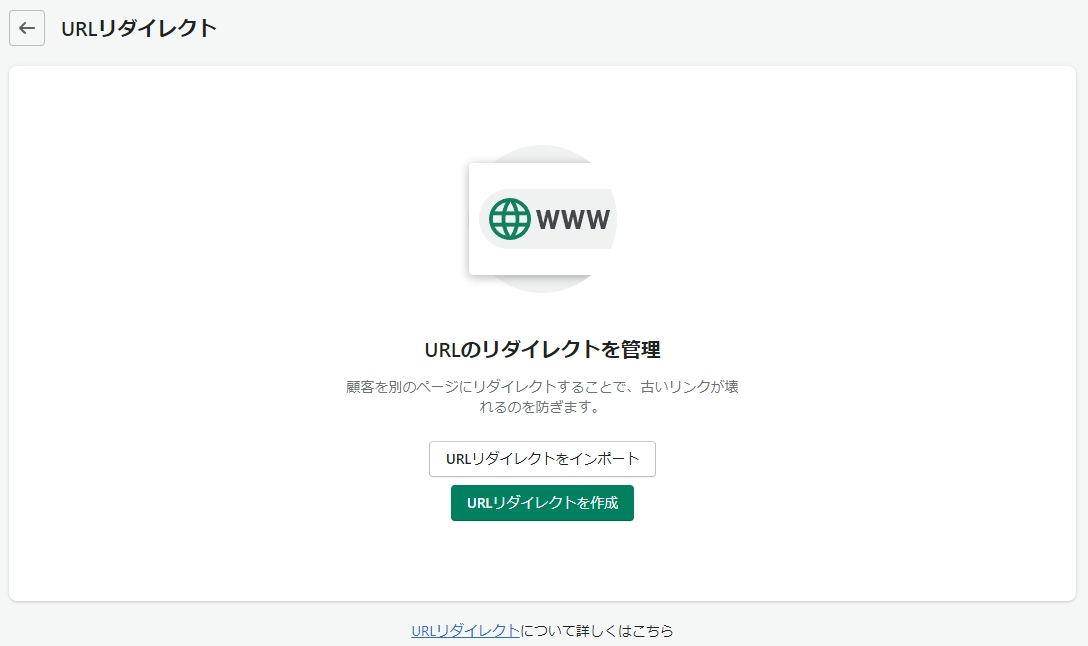
The above is a dedicated screen when nothing is set up initially. If you have set anything,

This screen should appear.
As you can see, there is a setting to redirect from the "redirect source" on the left to the "redirect destination" on the right.
**.com/pages/what-is → **.com/pages/wthat-is-shopify
If you access the URL on the left, you will be redirected to the URL on the right. The structure is very simple.
Single page redirects
In the image above, the example shown is a redirect within Shopify, but it will also work if you enter a URL outside of Shopify. Click the green "Create URL Redirect" button in the top right to see the screen where you can set up a redirect from the original page.
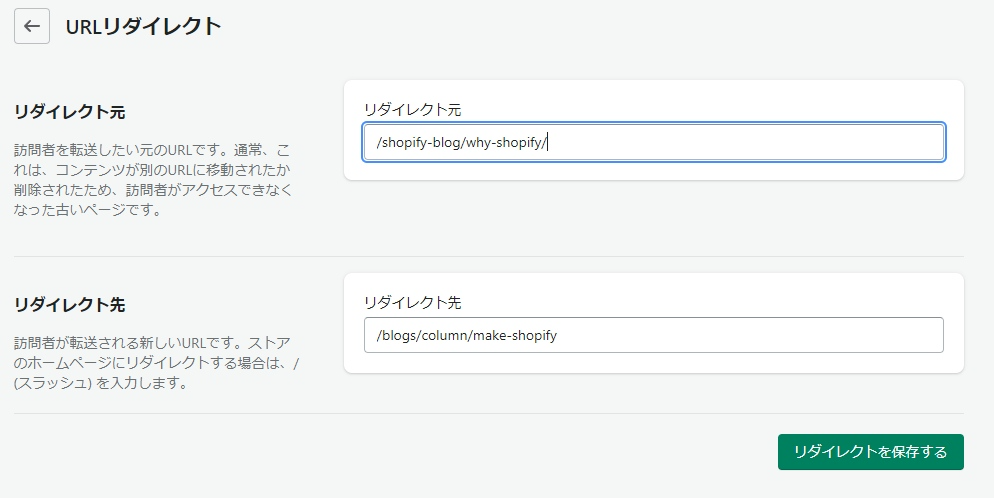
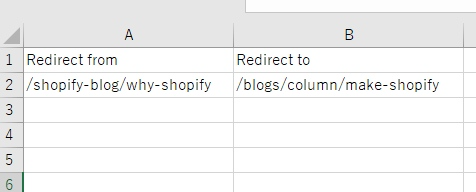
Originally, it was WordPress, so the blog list page existed as a "category," and the URLs of the articles that belonged to it existed as slugs. However, when transferring to Shopify, this slug (the "why-shopify" part above) can be set as a handle. Well, since I had the chance, I changed it to "make-shopify" at the bottom. So,
/ shopify-blog / why-shopify /
Since I can't create a URL like that on Shopify, I created a category called "Column" for the blog page on Shopify.
/blogs/column / make-shopify
It may be a little difficult to understand, but the red part is the "category" and the blue part is the URL for the "handle and slug". If you set it up like this, you can easily finish setting up one page. Click "Save Redirect"

This completes the redirect setup.
However, migrating an EC site is different from migrating a few blog posts. There are a lot of products, right? In such a case, you can't do such a small task. So next, let's look at setting up multiple redirects.
Bulk redirection of multiple pages
If you want to set up multiple redirects, you simply upload the data via CSV.
It may be hard to understand what kind of CSV file you need, but in that case, just export it and see. You can't export it if there is no redirect setting, so try registering something, even if it's just a dummy.
On that basis
Click on "Export" at the top
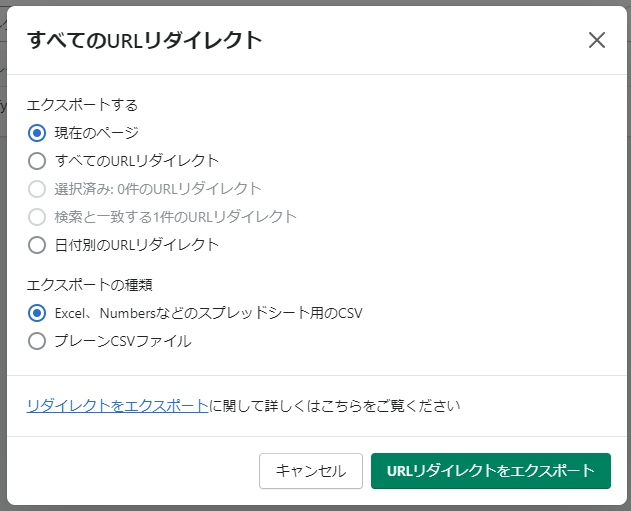
This will appear, so export the current page since that's all you need. Then a csv file will be downloaded, so open it in Excel since we're using Excel this time. This is very important, but if the URL contains Japanese text, it's better to open it in "Google Spreadsheets". If you use Excel, the Japanese text in the csv file downloaded from Shopify will be garbled.
So, when you open the downloaded file, it looks like this:
It's a very simple structure, but do not delete the first line ! You will need to enter information from the second line onwards.
As you can see, the structure is [the original page on the left] and [the redirect destination on the right]. If you have multiple pages, just keep adding more of these below.
In the case of our website, there weren't many pages, so when you enter everything, it looks like this.
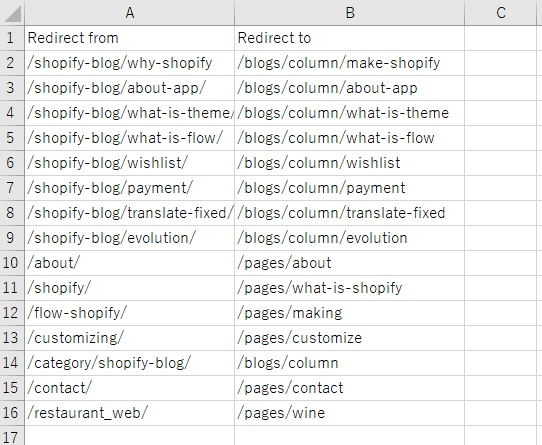
The left side is the URL from the WordPress era, and the right side is the URL for Shopify.
Static pages always have "pages" attached to them no matter what.
Blog pages will have "blogs" in them no matter what
You can see the structure from here, so if I try to import it,
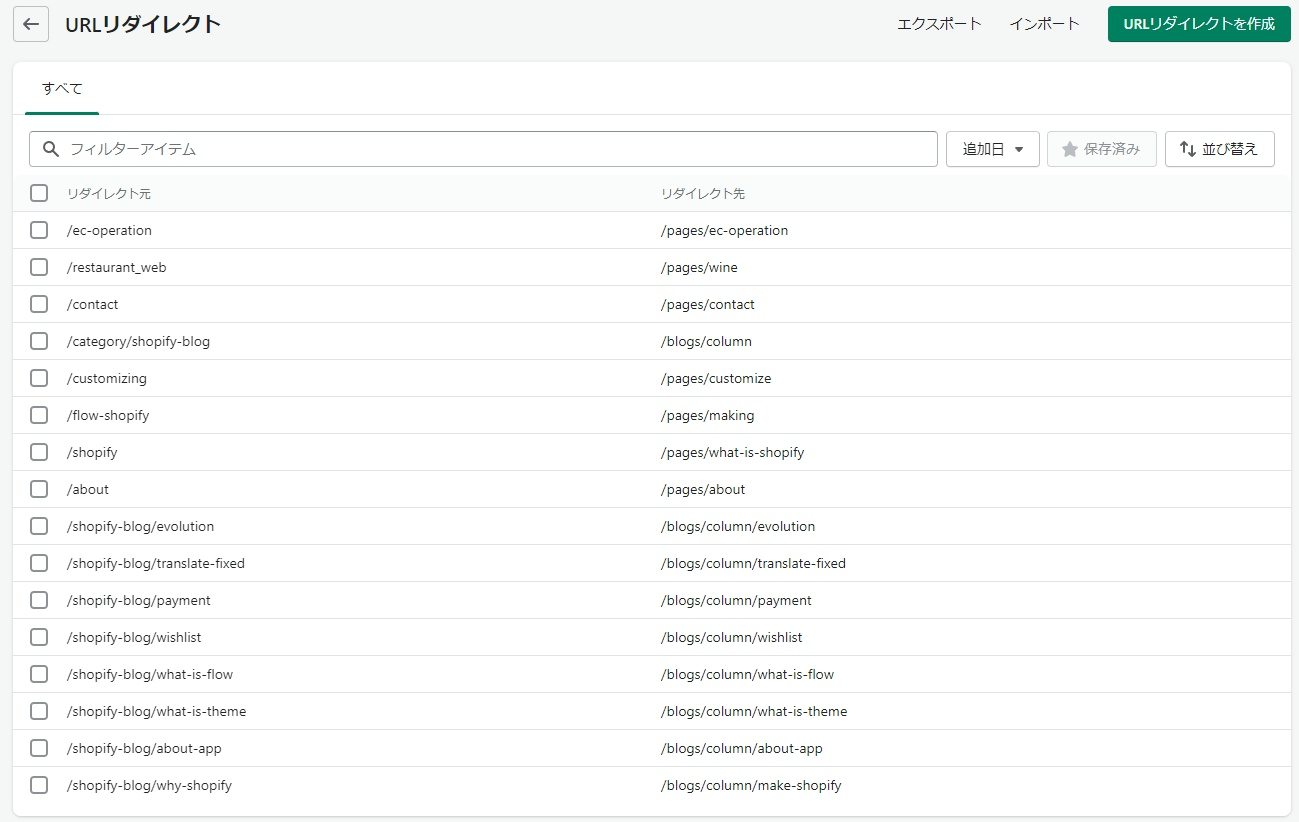
The list will be created like this, and you will be able to access past URLs without any problems.
https://cavedescript.com/about/
Please access the URL. (Just click the link above.)
The destination URL is
https://cavedescript.com/ pages /about/
I think it's like this. Shopify is great.
summary
As you can see, setting up the redirection itself is not that difficult.
- For some reason, the settings are in the menu.
- Single Case
- In multiple cases
As long as you remember these points, you'll be able to do it.
However, in this case the number of pages was not large, so the CSV set up above was almost entirely done manually, but an actual e-commerce site may have a large number of products available, and the number of redirect settings may sometimes exceed 1,000.
Taking all of that into account, it is necessary to make the original page URL and the Shopify URL consistent. Pay particular attention to the part of the URL that corresponds to the handle in Shopify. In most cases, if you want to process the data in bulk, you will need to format it using Excel or similar.
If you do not use the same handle for the URL on the existing site and the new site, you will not be able to compile all the data at once. When moving, it is important to match the "data" of the existing site with the new site.
The data transfer only differs by one digit. A difference of just one column can cause many mistakes, so in order to not lose important SEO-friendly situations, we recommend consulting an expert if you are unsure.